Wednesday, February 29, 2012

Simple Flower Tutorial

Disclaimer: This technique has probably been done a thousand times by people in every corner of the world.
I have not seen it done before, but that does not mean it's not out there.
I'm simply sharing a fun little flower that I made a few days ago.

Handmade flowers are all the rage it seems.

What I like the most is that they can be as simple or as elaborate as YOU want them to be.

All you need to make this one is a circle punch and some scissors.
Don't have a circle punch? You can cut some circles with your Cricut.
Or you can trace the bottom of a glass and cut it out.
Just get yourself two circles that are the same size.

I'm going to let the pictures show you step-by-step how I did it since I pretty much stink at giving instructions.


^Those are kinda cute. Add something to the center and you have yourself a darling little flower.^ 


Any question, please ask. 
These are so easy and fun to make!

Once you make one you will likely make a "few" more.


Oh, and use scrap paper! You know you have tons of it.
Don't you dare cut into new paper to make these flowers,
they're perfect for using up scraps.

I hope you enjoyed the tutorial, let me know if you give it a try!


Winner Winner Chicken Dinner, Part Deux!

I guess I'll have to stop saying 
"I never win anything."

Another package full of goodies!

This time from Jenn over at Jenn's Doodles.

I won her Valentine's Day giveaway . . . 


Love! You see that washi tape? Squeeeeeeee!

I haven't used it yet, I've just been petting it.


So, THANK YOU to Jenn.

Go check out her blog, she's a super talented sweet lady!



Friday, February 24, 2012

A Special Birthday Gift

Yesterday we celebrated our daughter Megan's 11th birthday.

The wonderful age that is too grown up for toys and games,
but not quite old enough for makeup, iphones and laptops.

We decided to get her gift cards to her favorite stores.

And, of course, I could not simply give her a gift card in an envelope.


This is a tin that held hot cocoa, it was a regifted Christmas gift.

I used the gorgeous October Afternoon papers that I received from Jolaine's giveaway.


I used Mod Podge to adhere the paper to the tin and a coat over the top to protect it.

Here are the sides of the tin  . . . 


I'm going to add a monogram to the lid.
The lid would not fit on top due to the height of the tags (measure twice, cut once?),
so I punched a hole through the lid and the side of the tin and tied it on with some Doodle Twine.


I can't remember where I got the phrase stickers, EK Success maybe?
I've had them for a while and I thought the sentiments worked perfectly for this project.

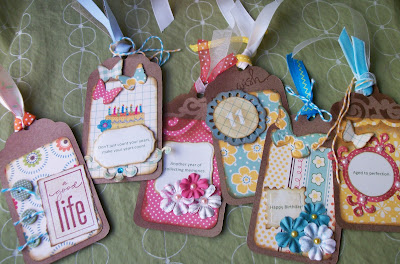
Then it was on to tag making.

I won't bore you with all of the gory details, but it involved lots of Glimmer Mist,
stencils, ink and ribbon.


Then I adhered the gift cards to the backs of the tags . . .


It was the perfect gift for the perfect girl.

Her face lit up and she said, "I can't believe you would go to all of this trouble just for me."

Oh, if she only knew. We'd move the Earth for them, wouldn't we?

Tomorrow we tackle the mall. Wish me luck!


Tuesday, February 21, 2012

Anniversary Card

I've seen so many gorgeous monochromatic projects lately
that I just had to sit down and create something of my own.

It's tricky working with such a limited color palette,
but I'm really happy with the way this card turned out.


My Big Shot got A LOT of use on this card!

Looking at it now I kind of wish I hadn't added the greenery,
but I still love it.


I used three different sets of Spellbinders and layered them.

I embossed the bottom and top layers using some Cuttlebug folders.
The rolled flowers --  who knew they were so easy?!
I cut out a circle with my circle punch and cut a sloppy spiral.
Then rolled it up and added a pearl to the center.
Easiest. Flower. Ever.

Here's the sentiment on the inside:


I'm entering this in the challenge over at Charisma Cardz.

Products Used:
Spellbinders Foliage
Spellbinders Rose Creations
Spellbinders Eyelet Circles
Spellbinders Fleur De Lis Motifs
Spellbinders Blossom Tags and Accents
Cuttlebug Folder D'vine Swirls
Cuttlebug Folder Stylized Flowers
Liquid Pearls Silver Pearl
Zva Creative self adhesive pearls


Wednesday, February 15, 2012

Hello!

Today I wanted to see just how many of my fun new toys I could cram onto one card.


Some masking with a new stencil and chalk ink,
layering with some new Spellbinders, 
and a whole family of butterflies. 
The twine is new, too. Isn't that the most gorgeous shade of blue?


It may look like a jumbled mess to some,
but I love all of the different colors and textures.


Unlike so many of my cards,
this one can actually fit in a regular envelope
and go straight into the mailbox.

I'm very excited about that!

Products Used:
Spellbinders - Blossom Tags and Accents
Spellbinders - Butterflies
Doodle Twine - Swimming Pool
Liquid Pearls - Silver Pearl
Distress Ink - Black Soot and Vintage Photo
Patterned Paper - DCWV Citrus and Natural


Tuesday, February 14, 2012

Doggy Love

Happy Heart Day, friends!

I will admit to not being a huge fan of the holiday hoopla.

I'd rather receive a bunch of daisies on a random Thursday
as opposed to an $85 vase of roses on Valentine's Day.

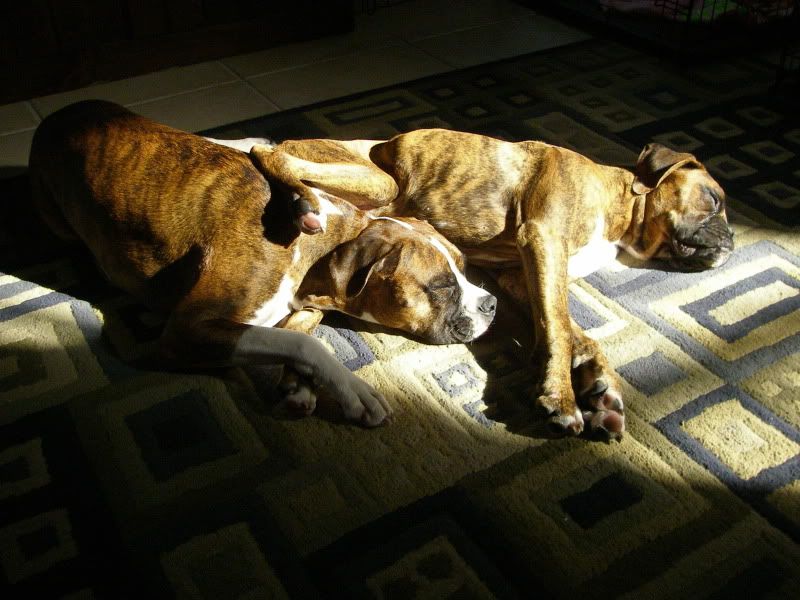
In honor of this day of love I am sharing some pictures
of two creatures that definitely have my heart.

They are Daisy (she's the one with white on her face) and Brodie - 
our adorable, silly, trouble making Boxers.

You will rarely find one without the other and as you will see
they usually have to be touching each other.

I hope the pictures make you smile!


Monday, February 13, 2012

Graduation Hat Card

First, let me apologize for being such a horrible blogger.
The sun was hiding from us for a long period of time which completely zapped my creativity.
Yesterday the glorious sun returned to us and kindly delivered my mojo back to me.

A neighbor over on Scrapbook.com asked a question regarding graduation cards.
A quick Google search led me here.

Of course I had to try it and I'm so glad I did!


Isn't it adorable?!

Here's what it looks like when you open it up:


I want to find some sort of stamp for the top.
I'm sure Michael's will have something available soon in their $1 spot.

I just did a simple "Congratulations" on the bottom
which leaves plenty of room for a personal message.
I'm going to play around with it because I bet a cut in the top
of the large white piece of paper would make a perfect
slot for a gift card.


My favorite part of the card is the cute little tassel.
You can buy those tassels,
but this one was essentially free because it's just a piece of ribbon!


Watch the tutorial and you will want to make one, too!