Today I'll show you how to get 2 flowers from the same die.

Using Spellbinders Spiral Blossom One.

Choose your paper and run the die through your machine.

This is what you get after using the tan mats to emboss.

You can stop here, roll it up and have one MAGNIFICENT flower.
I took it a few steps further to have a flower that was a little flatter and a little smaller,
making it easier to work with layouts and cards.
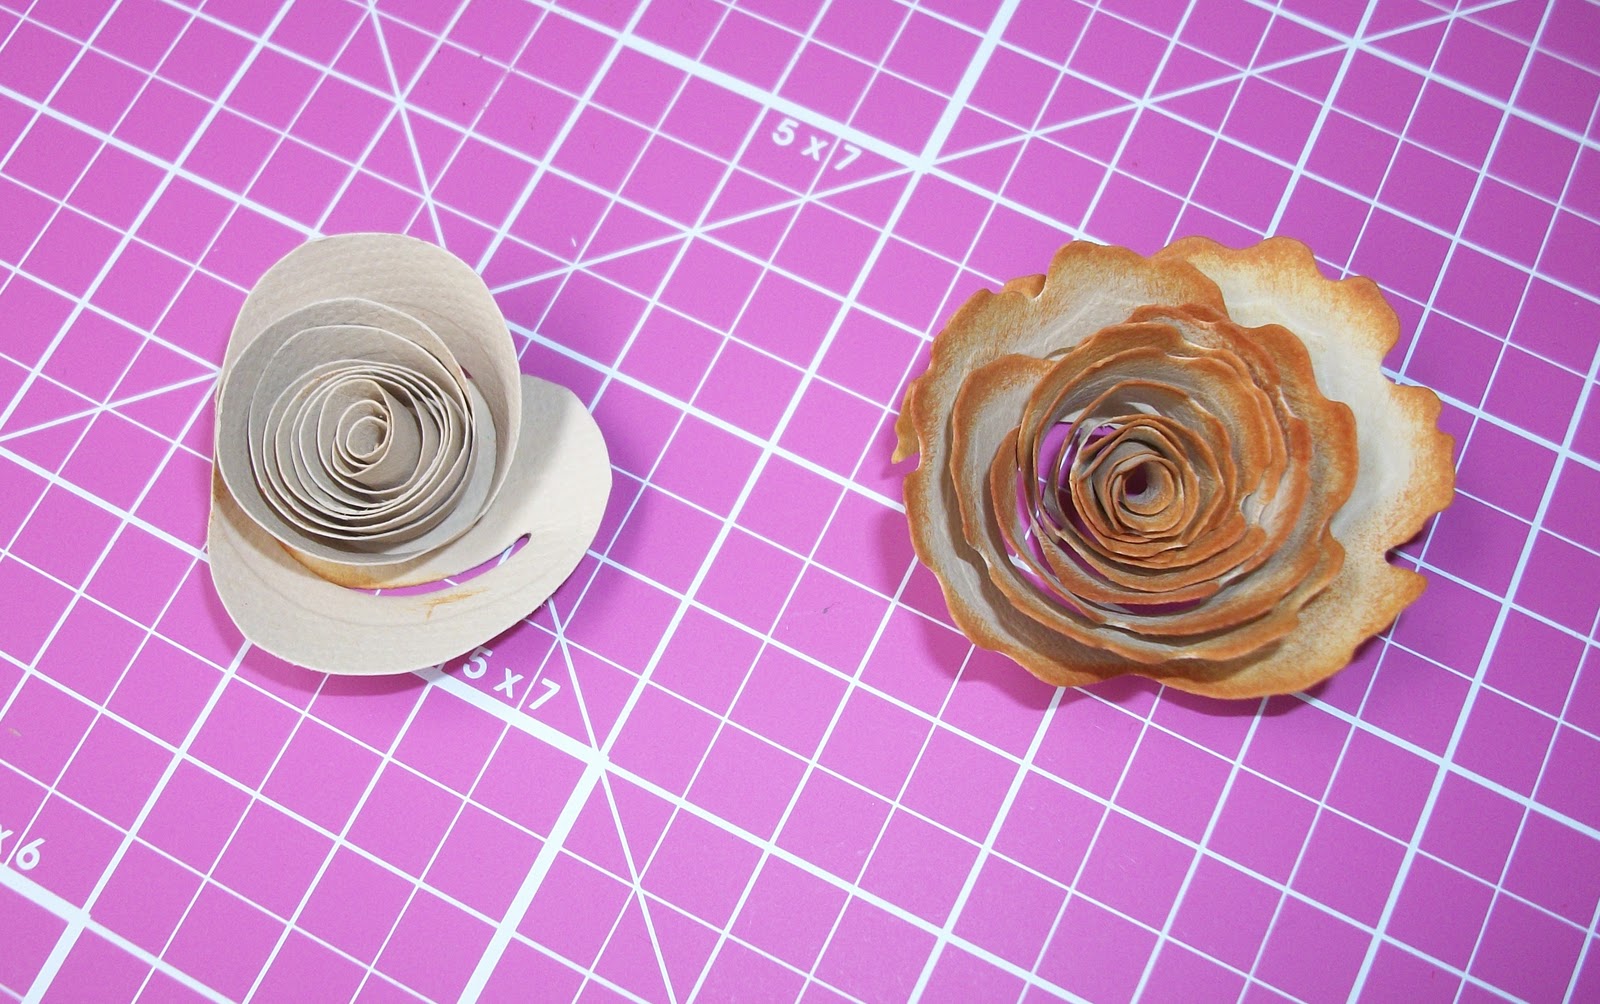
If you're going to ink the edges, do it now.
Use a little, use a lot. There are no rules in inking.

Start cutting in the middle of the spiral, making sure to follow the "humps".
(Humps?)

Go all the way around.

And you're left with two spirals.

Start rolling, beginning with the outer end.
Unroll the "fancier" one and adjust the petals to your liking.
I like to use my paper piercer because it's the perfect size.

This is what you'll be left with . . . roll it up again.

Turn it over and apply adhesive to the bottom (I LOVE Glossy Accents).
Adhere to a small scrap of paper.
You can trim any excess paper off when it dries
and this makes it so much easier to attach to a layout or card.

Add a small dab of adhesive to the end of the other spiral.

Attach it to a scrap, wait til dry, and then trim any excess away.

And that's it!
Two very different looking flowers from the same die.

You can also cut the strips in half to create even smaller flowers!
Awesome!!! :) You are pretty crafty to figure that out! :)
ReplyDeleteThanks for the lesson. The photos are very helpful!! Now I just need to go out and buy all that stuff...
ReplyDeleteyou are BRILLIANT!!!!!!!!!!!!!! thanks!
ReplyDelete